Cleaning Arch Linux
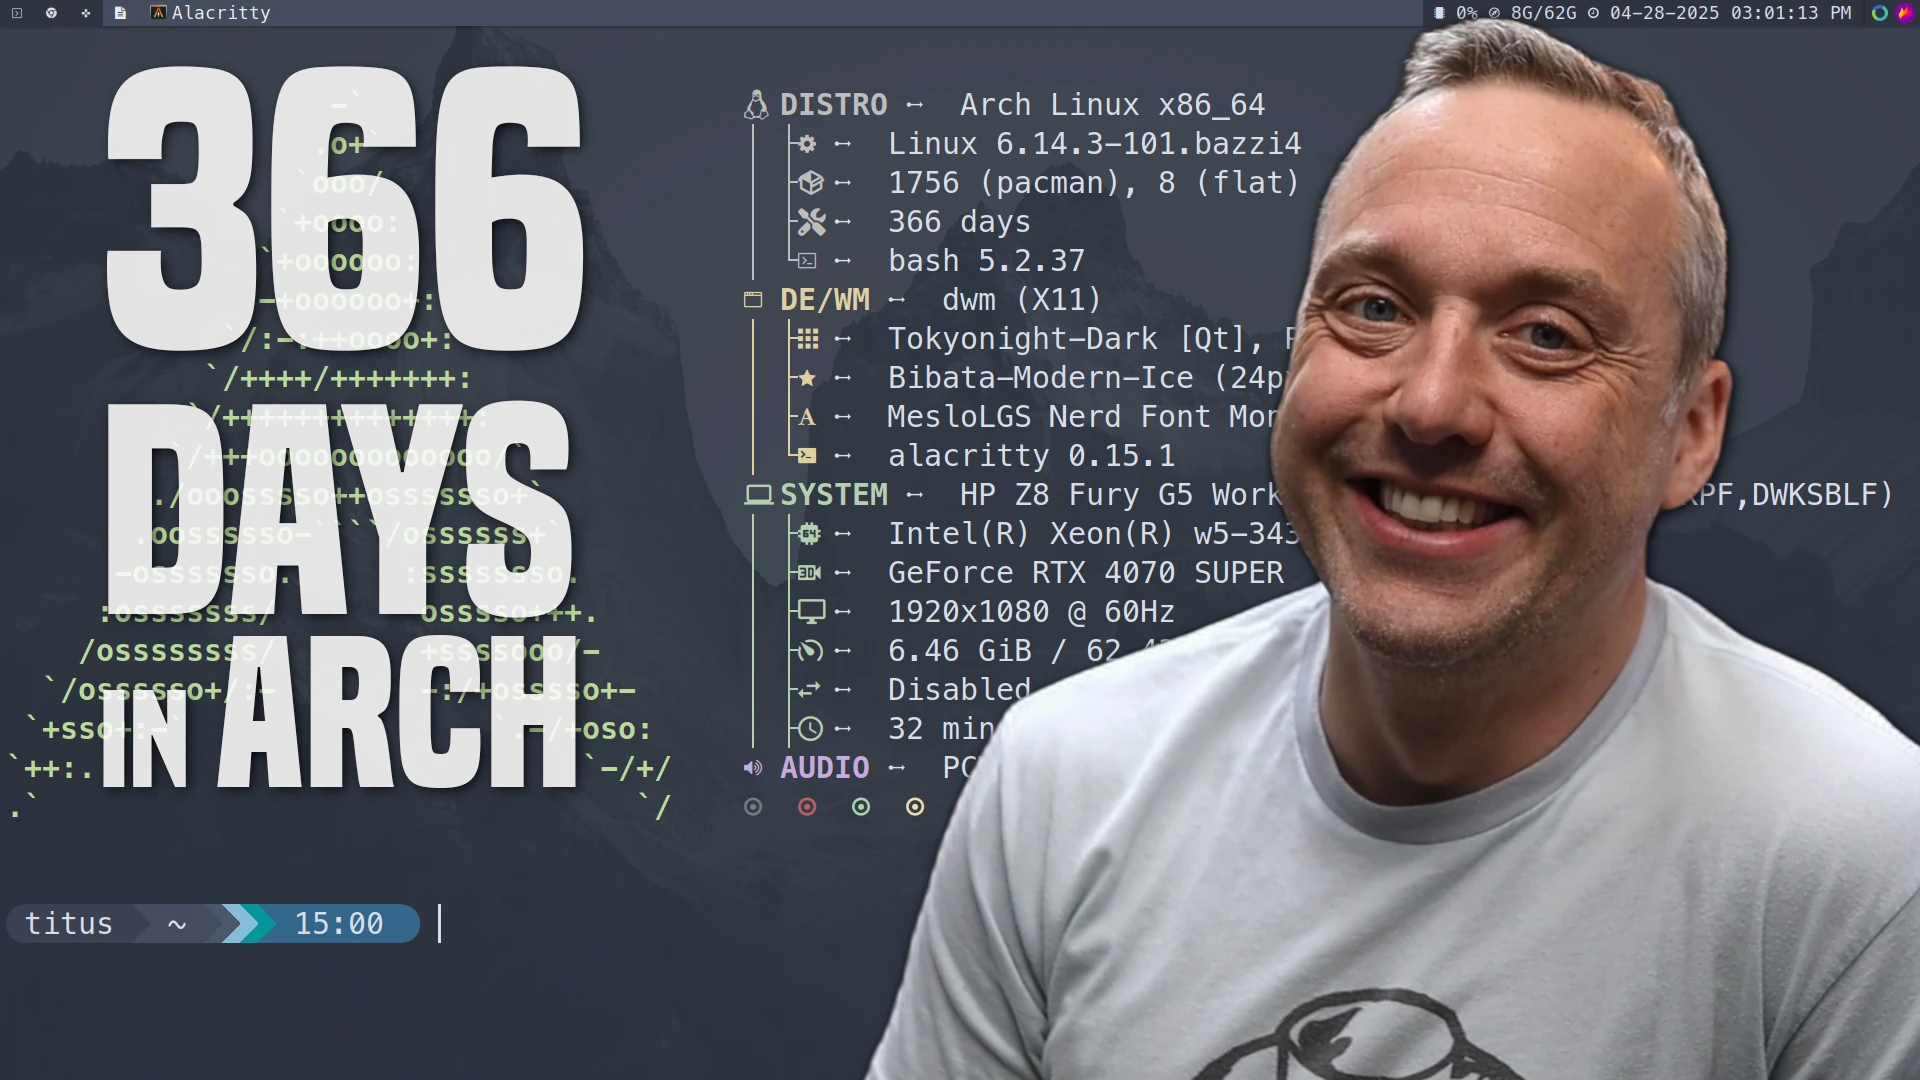
I’ve officially been on Arch Linux for 366 days and have DONE EVERYTHING I can do to break it.
Not only has it stood the test of time, updates, and my shenanigans, but it is just as good or BETTER than when I started. THE POWER OF LINUX!
It SHOULD of Broke!
Here is a list of things I’ve tried and many on live streams while working. These things I do not recommend doing ever, but I wanted to see how much it could withstand.
- PCI Passthrough (Difficult, but it worked great after some tinkering)
- Shrinking and Growing all the partitions on the system drive. Root, Boot, and Home partitions all changed AFTER install.
- Custom Kernels (Zen, Bazzite, lts, etc.) - All were done WITH an nVidia 4070 Super, sometimes with DKMS modules and other times without.
- Multiple DE installs and Window Managers. Hyperland, Sway, i3, KDE, etc. (Some packages are still there and others were purged)
- Changing Display Manager multiple times… currently I don’t have one.
The Bloat of Time
With any operating system there is bloat from added programs, packages, and general usage over time. On Windows you are reloading and nuking your OS every couple years or sooner. With Linux you have the power to clean out anything that doesn’t work for you. So you have all the functionality without any of the bloat. However, You must do the debloat and keep things running top notch. Here are a few areas I expanded and cleaned on my Arch Linux install.
- Cleanup Flatpaks
flatpak uninstall --unused - Find bloat in Root
ncdu / --exclude /media --exclude /run/timeshiftNote: My 100GB Root drive filled and ncdu found a bunch of files from ollama and running local LLMs - Manually installed programs in
/opt - Clear pacman cache
yay -SccNote: Cache needs to be cleared every so often as it does eat disk space - Old timeshift backups Note: Always backup everything, but prune the crap that is old. I also recommend doing this from Timeshifts GUI!
- Check Partition usage:
df -hto see free space andlsblkto see mount points on which device