
Neovim is one of the most powerful, but often misunderstood, editors in existence. Let’s approach it from a beginner’s perspective and show why it is now my editor of choice.
This article originally covered Vim and my old
myvimconfiguration. I no longer use Vim, and themyvimproject has been retired. I have moved to Neovim, and my active configuration is the ChrisTitusTech/neovim project. For the latest deep dive into that setup, see Neovim the Elite Editor.
Why Neovim?
There is a lot to learn about Neovim, but the first question is usually: why not just use VS Code or IntelliJ?
Those editors offer an easy starting point, excellent debugging, and huge extension ecosystems. Neovim takes a different approach. It gives you the speed and keyboard-driven editing model of Vim, then adds a modern Lua configuration system, built-in language server support, and a plugin ecosystem that can turn it into a focused development environment.
An experienced Neovim user can move through a project, search files, refactor code, and operate several tools without reaching for the mouse. If you want to see that editing style pushed to its limits, watch ThePrimeagen.
The tradeoff is the learning curve. Neovim is not something you completely master in a weekend. It takes time to build the motions into muscle memory, but the payoff is worth it when editing starts to feel immediate instead of being a series of menus and mouse movements.
Learn the Vim fundamentals
Neovim uses the same modal editing model and motions that made Vim so effective. The first thing to understand is its modes:
- Normal mode - The default mode. Use it for movement, commands, and editing operations.
- Insert mode - Press
ito enter text. - Visual mode - Press
vto select text and then run an operation on the selection.
Press Esc to return to Normal mode from Insert or Visual mode. My
configuration also maps jj in Insert mode as a faster escape.
The running joke is that nobody knows how to exit Vim. The same commands work in Neovim:
- Save and quit with
:wq,:x, orZZ. - Quit without saving with
:q!orZQ.
The important idea is still:
If something feels slow in Neovim, there is probably a faster way to do it.
Useful Vim motion cheatsheets still apply to Neovim:
View post by @christitustech on X
Practice before you customize
Run :Tutor inside Neovim and work through it repeatedly. Treat it like a
speedrun: finish it, repeat it, and try to rely less on the hints each time.
That repetition is how the motions stop being individual keys and become
muscle memory.
Move as much of your real workflow into Neovim as you comfortably can. At the same time, do not blindly copy every keymap from somebody else’s config. A configuration should reduce friction in your own work.
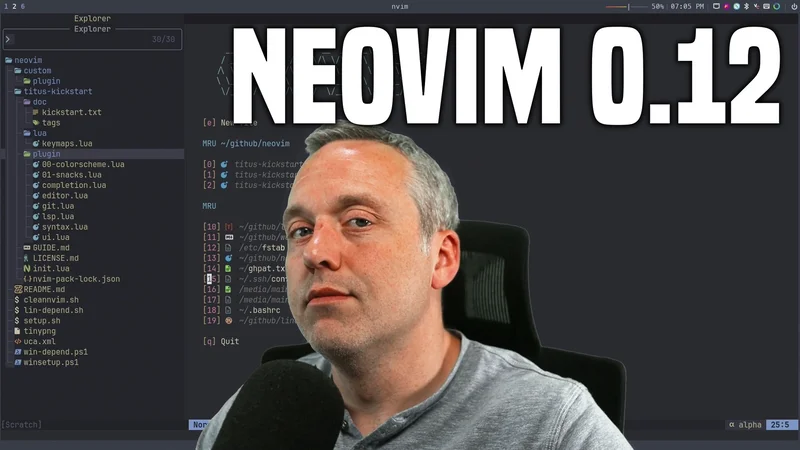
My current Neovim project
My old setup was a single .vimrc in the now-retired myvim repository. The
replacement is a complete Lua-based Neovim project built on
kickstart.nvim.
The current setup includes:
lazy.nvimfor plugin management and Mason for language tools.- LSP features, diagnostics, formatting, completion, and snippets.
- Snacks and Oil for project search, file navigation, and an explorer.
- WhichKey for discovering shortcuts as you learn the configuration.
- Bufferline, Trouble, Aerial, Undotree, and an integrated terminal.
- Markdown image pasting, linting, and distraction-free writing tools.
- Optional GitHub Copilot completion and Copilot Chat integration.
The leader key is Space. Press it in Normal mode and wait for WhichKey to
show the available commands. A few shortcuts I use constantly are:
| Shortcut | Action |
|---|---|
<leader>ff |
Find files |
<leader>fg |
Search text across the project |
<leader>fe |
Open the file explorer |
<leader><leader> |
Switch between open buffers |
<leader>f |
Format the current buffer |
<leader>xx |
Open project diagnostics |
F5 |
Open the persistent undo history |
The complete keymap, plugin, dependency, and troubleshooting reference lives in the project’s configuration guide.
Install my Neovim configuration
The project supports Neovim 0.10 or newer and expects Git, a Nerd Font, and a few command-line dependencies. Clone the repository to a normal project directory so its dependency script can link the actual configuration into place.
On Linux:
git clone https://github.com/ChrisTitusTech/neovim ~/neovim
cd ~/neovim
bash lin-depend.sh
nvim
On Windows, run the equivalent repair script from PowerShell:
git clone https://github.com/ChrisTitusTech/neovim "$HOME\neovim"
Set-Location "$HOME\neovim"
.\win-depend.ps1
nvim
The repair scripts install or check the supporting tools and point Neovim at
the titus-kickstart configuration. They leave an existing non-symlink config
directory untouched, so rename your current Neovim config first if you want to
switch to this setup.
On first launch, lazy.nvim installs the plugins. After startup, use these
commands to verify the environment:
:checkhealthchecks Neovim and provider health.:Lazyopens the plugin manager.:Masonopens the language server and tool manager.:LspInfoshows the language servers attached to the current buffer.
Make it your own
Use my project as a starting point, not a configuration you are never allowed
to touch. Options and core startup behavior live in
titus-kickstart/init.lua, while the plugin configuration is split into files
under titus-kickstart/plugin/.
Change the mappings, theme, formatters, and language servers around the work you actually do. That is the real advantage of Neovim: the editor can grow with your workflow without forcing you into somebody else’s idea of an IDE.
For the most recent overview of where I have taken the project, read Neovim the Elite Editor.



Comments
Comments load when this section comes into view.